Pre-Press Printing Tips
Read time: 5 minutes | Author: PRI Graphics | Posted: January 31st, 2023
Setup Pre-Press Printing Tips
There are several pre-press printing tips to be aware of that are critical for ensuring that the final product meets the desired standards for quality and accuracy.
Pre-press printing refers to the preparation and setup of a printing job before it is actually printed.
Here are the pre-press printing tips to keep in mind to ensure successful printing:
Tip #1: Planning Ahead Before Printing
It’s important to have a clear idea of what you want to print, including the size, quantity, and materials you will be using. This pre-press printing tip will help you determine the best printing process for your project and ensure that you have all the necessary materials and equipment on hand.
Tip #2: Choose The Right Printing Process
Check out our post on Lithography vs Digital Printing. Different printing processes are better suited for different projects, so it’s important to choose the right one for your needs.
Consider factors such as the types of printing products you need, the kind of material you will be printing on, the number of prints you need, and the level of detail and accuracy required.
Tip #3: Create High-Quality Artwork
Use high-resolution images because the quality of your images is crucial for producing a high-quality print. Make sure to use images that are at least 300 dpi (dots per inch) in resolution to ensure that they will print clearly and sharply.
It’s also a good idea to use a professional design program, such as Adobe Illustrator or InDesign, to create your artwork. Utilizing vector-based graphics within your artwork will also benefit the final quality of the print. Vector graphics can scale easily to any size without loss of detail. See this article to understand more about the differences between vector vs raster graphics.
Tip #4: Use The Correct Color Profile
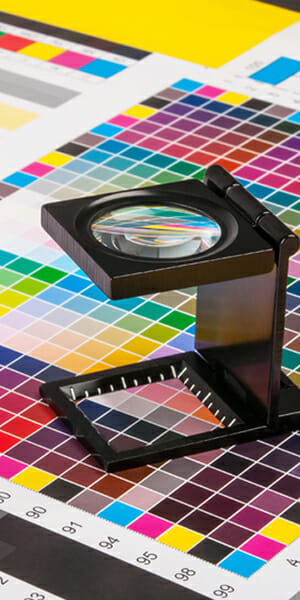
This is a vitally important pre-press printing tip because different printing processes use different color profiles. That’s why it is so important to use the correct profile for your project. This will ensure that the colors in your final printed product match what you see on your computer screen.
Convert images to CMYK since most printing processes, including lithography and digital printing, use the CMYK color model. If your images are in RGB (red, green, blue) format, they will need to be converted to CMYK before printing. This can be done using photo editing software, such as Photoshop.
Check your color settings to make sure that your color settings are correct and that you are using the correct color profile for your printing process. This will ensure that the colors in your final print are accurate and consistent with your original design.
Tip #5: Follow Proper File Preparation Guidelines
Each printing process has its own guidelines for file preparation, so it’s important to follow these guidelines to ensure that your files are set up correctly. Creating print-ready files may include things like specifying the correct file format and setting the correct resolution.
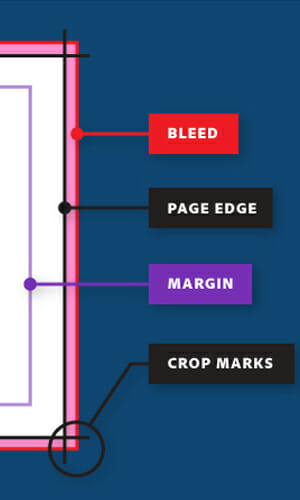
Bleeds and margins are also important pre-press printing tips.
Bleeds are the parts of your design that extend beyond the edge of the page, and margins are the space between the edge of the page and the content. Make sure to include bleeds and margins in your design to ensure that it prints correctly and looks professional. Click here for proper design guidelines from PRI Graphics & Signs.
Tip #6: Proofread Your Files
It’s important to proof your design before printing to ensure that everything is correct and to catch any mistakes or issues.
Before sending your files to the printer, it’s a good idea to proof them by printing a hard copy of your files or by using a digital proofing system.
Final Pre-Press PrintingTip:
Communicate With Your Printer
Good communication with your printer is key to successful pre-press printing. Different printers have different requirements for file formats, color models, and other aspects of the pre-press process. They can also help you when choosing paper quality since that can also affect the printing.
Make sure to discuss your project with your printer and provide any necessary instructions or specifications. Then follow the printer’s guidelines. This will help ensure that your project is printed correctly and to your satisfaction.
Summary
By following these pre-press printing tips, you can ensure that your printing job is set up correctly and that the final product is of high quality and meets your expectations.
Pre-press may require a little extra time and effort, but it is a crucial step in the printing process that can help you produce a professional and effective final product. Check out this Wikipedia page for more information on Pre-Press Printing.
About PRI Graphics & Signs in Phoenix AZ
With over two decades of experience, PRI Graphics & Signs has been helping individuals, small business owners, and large commercial companies throughout Phoenix and Arizona. We even service the printing needs of customers out of state!
From small-format digital printing jobs like stationery, brochures, flyers, and presentation printing to larger format printing of banners, signage, and wall coverings, and more, no print job is too small or too big.
Ask us about managed printing services for large corporations and commercial businesses.
We’d love to hear from you by email or through our online contact form.
Please call us directly at 602-393-3131 or toll-free at 1-877-409-8889 if you still have questions about any of the pre-press printing tips in this article.
